Sunday, April 25, 2010

Going Local: Tomato Soup From Scratch


Ok.  So maybe tomato soup is more of a fall food.  When the leaves start turning and there's a chill in the air.  For us here in The Dush, we are into the low 80s during the day.  So why tomato soup?  1) I love tomatoes!  and 2) You should see how many canned and jarred tomatoes I have in my pantry. I must have had some irrational fear of a tomato shortage going into the winter season last year.  Not only did I hord store bought jarred tomatoes whenever I found them, I also preserved a ton of them last September. 

This is my quick and dirty version of tomato soup.  The ratio of tomato to onion to garlic is variable and is determined by what I have on hand and how garlickly I think I can go with the soup and still have my five year olds eat it.

Which leads me to the third reason I make this soup.  3)  My girls LOVE it.  

Grab a couple of garlic cloves.


Smash them with the flat side of your knife with your palm.  Do NOT cut yourself.  Again, there's no reason for any of us to be testing the Tajik medical system.  Some things are better left to the imagination.


With the flat side of the blade, sharp edge away from you, bash the cloves with your fist and occassionally sweep the sharp edge at about a 20 degree angle across the crushed cloves.  Ignore this step if that doesn't make sense.  You're just trying to flatten the cloves so you can more easily mince them. 


Once flattened, mince finely.


Then grab an onion or two and dice them.


Grab your olive oil and put a few glugs into the bottom of a good sized pot.  Perhaps one or two tablespoons worth.


Saute the onion for about five minutes, then add your minced garlic, sauteing for another five minutes or so.


Add your jarred tomatoes.  


Plain jarred tomatoes are not always available in these parts (see Hording above).  Don't confuse them with the much more readily available pickled tomatoes.  Although, if you dumped the brine it might not be that bad....

These tomatoes had their skin on so once in the pot I easily slipped the skins off with my fingers.


Fill your jar up about 3/4 of the way with vegetable stock - or chicken stock, or beef stock or even water.


Then add to the tomatoes.


Simmer over medium heat for at least 15 minutes, but longer if you wish.


Then it's time to whip out your handy stick blender.


Notice the orange hue?  It's made so many tomato soups that it's permanently stained.  I like that.


Immerse your immersion blender directly into the pot and carefully puree it until it's smooth.  Eat now or save for later.  It's even better the second day!


Pair it with a grilled cheese, and all's right in the world again.

Monday, April 19, 2010

Rhubarb Strawberry Tart From Scratch


Rhubarb grows wild 'round these parts.  And its currently in season.  Vowing to be more adventuresome and take full advantage of seasonal fruits and vegetables this year, I bought myself a big bunch.

I confess that last year I bought it, never got around to using it and it went straight into the compost pile.  But not this year.  This year I set my mind to making a rhubarb strawberry tart, which I adapted from this Martha Stewart recipe

The night before I made the tart, I sprinkled sugar over the cut up rhubarb and let it hang out in the fridge overnight.


When it was time to make the tart, I generously buttered my tart pan with the removable bottom.


And gave it a dusting of flour. 


I was ill prepared and didn't have any room temperature butter, so I grated the butter with a cheese grater.   


Not bothering to get out the hand mixer or use my food processor, I mixed the butter and the sugar by hand. 


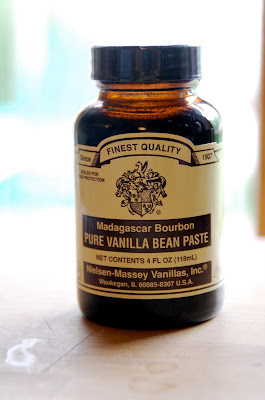
The recipe called for a vanilla bean, which I didn't have.  But I did have this cool vanilla bean paste I've been wanting to use.


It can also be used as a substitute for vanilla extract.  Very cool.


See the specks? 


The batter came together very quickly.


I thawed some frozen strawberries from last season, which took the place of the blackberries.  I did my best to squeeze the liquid from them so the tart wouldn't be soggy.


Once the batter was distributed evenly in the pan, the rhubarb and strawberries were strewn on top.  


And then, once in the oven, I realized I forgot the last sprinkling of sugar.  With care not to singe the hair on my arms, I dusted a layer of sugar over the fruit.  Or is rhubarb a vegetable?


The recipe said to cook for 60 minutes, and I'm thankful I glanced at the tart at 50 minutes because it was already on the very brown side.  Which actually was a nice counterpart to the vanilla ice cream.  


Next go around with rhubarb?  Perhaps something savory, like a chutney or a sauce for meat.

Thursday, April 15, 2010

Eggless Oatmeal Muffins From Scratch


This post is less about my eternal quest for delicious wholesome snacks for my girls and more about a revelation I had when I found out I was out of eggs midway through the making of a batch of oatmeal muffins.  

In fact, like many things I make in the kitchen, I didn't take any pictures of the process of making these simple oatmeal muffins.  My girls were due home in less than an hour, and is usually the case, I was simply trying to knock these out before they turned into little cranky snack-less monsters.  

Half way through making these I discovered that the sole egg that I thought was in the fridge was actually not there.  I have a friend who can't eat eggs right now because her six month old baby is allergic and I recall reading about egg substitutes in baking.  I knew flax seeds were a replacement, but I hadn't tried this before.  Well, before this batch of muffins, that is.  

I discovered that if you grind 1 tablespoon of flax seeds in a coffee grinder and then add 3 tablespoons of water, the gelatinous-y goop that results in a perfectly good substitute for one egg.  Not to mention a big boost of omega-3s!


Both girls gobbled these up (one even asking for a second) and thusly avoided any sort of witching hour today.  In my book, that's reason to celebrate.  And to make sure I make these again in the very near future!


Oatmeal Muffins
adapted from the Better Homes and Garden cookbook
yield:  12 muffins


1 1/3 cups of flour
3/4 cups of oats
1/3 cup of sugar
2 teaspoons baking powder
1/4 teaspoon salt
1 tablespoon ground flax seeds mixed with 3 tablespoons of water
3/4 cups of milk
1/4 cup cooking oil

Preheat the oven to 400 degrees.  Grease and flour a muffin tin.  

In a large bowl, mix the flour, oats, sugar, baking powder and salt.  Create a well in the center for the wet ingredients.

In a separate bowl, mix the flax seeds mixture, milk and oil.  Quickly pour the wet ingredients into the dry and mix sparingly -- until the batter just comes together.  If you over mix you'll end up with some nice hockey pucks.  

Bake for 18 - 20 minutes or until an inserted toothpick comes out clean.


Sunday, April 11, 2010

Rooibos Mint Sun Tea From Scratch


Continuing the beverage theme, I made a big batch of sun tea this weekend.  It was very reminiscent of high school for some reason.
First I layered a few pieces of muslin.  


Then I found some South African rooibos teabags in the pantry.  I measured out about 1 1/2 tablespoons of the rooibos. 


And then about 1/2 tablespoon of darjeeling tea.   This is just what I had on hand.  You can go any which way with this. 


And then I added an equal portion of dried mint (2 tablespoons) onto the muslin clothe.  I love mint!  Fresh, dried, doesn't matter. In my tea, in my mojito, in my mint chip ice cream, in my salads.  Delish.


Next I tied the tea and mint up with some string, forming a make shift steeping bag. 


Then I cleaned out the largest glass container I have.


And poured about 12 cups of water in it.


And tossed in the tea and mint combo.  Looks like a gross science experiment doesn't it?  Think fetal pig.  Or not.  Maybe that's why this tea reminds me of high school...


Bring your tea outside into direct sun for a few hours to steep.


After about an hour, this is what it looked like. 


And after about three hours, it was done!


The mint adds such a nice kick.  Next time I'll try fresh mint and see if I can't get the minty background even brighter.

Put it in the fridge and serve over ice so it's nice and cold.  Then grab a book and find your hammock and enjoy a quiet Sunday afternoon.  Then tell me what a quiet afternoon reading a book in a hammock drinking fresh sun tea feels like so I can live vicariously through you!


Wednesday, April 7, 2010

Chai Latte Concentrate and Crumpets


The other day my friend A was telling me about this amazing product called chai latte concentrate, which allows you to bring Starbucks pretty much into your home.  But then the story turned sad because she told me about how she drank it all up in about two seconds flat and obviously couldn't buy any more in Dushanbe.  

After educating myself on what's in a chai latte, I found this recipe from A Crafty Lass.  This reminds me of the tea that my Indian friend Madhu used to make when we lived in Baku.  In fact, it's really no different. 

We made two double batches, one caffeinated and with honey (for the new mom) and one with decaf tea and no honey (for the older mom).  

Here's A's pre-honey. 


And, now, with the glob of honey.  The honey is from Khujand, a city in the north of Tajikistan.  I was told it was special mountain honey.  It sure was special.  The moment it started melting on the stove at least half a dozen wasps flew into the kitchen to see what all the fuss was about.  


After a fair amount of running wildly around the kitchen with a fly swatter, the concentrate with the honey heated up and looked like this. 


And here's my unleaded varietal.


While the two pots simmered, Little L managed to catch a bit of shut eye on the floor in the adjacent room.  Don't you just want to eat her up?


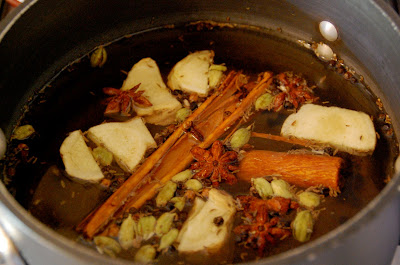
After the spices simmered for a bit, we added our respective tea bags, and then continued simmering.  Once all the simmering was done, we strained each pot. 


And were left with liquid gold. 


We then heated some milk and made ourselves a cuppa.  We both agreed that we preferred more concentrate and less milk.  In fact, when I went back to make my umpteenth cup of the day, I actually added another tea bag.  Next time, I'll double the amount of tea bags.


To enjoy with our chai latte, I decided to make a batch of crumpets.  A's off eggs because the baby is allergic to them and her partner is British.  Crumpets fit the bill perfectly - a sort of cross between a pancake and an english muffin.  

They are easy enough to make, but I strongly suggest you do not let the batter rise longer than the recommended hour.  If you decide to do so, please do so at your own risk.  The clean up was a bitch.


Like pancakes and english muffins, crumpets are dry cooked in a pre-heated pan.  I don't have english muffin rings (or empty tuna cans, as one website suggested) but I did have these cute fluted molds.  


I put the rings in the pan and then filled with the batter. Once the bubbles appeared on the top, I tried to gently disengage the crumpet from the cute mold, which was harder than one would think, despite generously greasing the rings.  Next time I'll go for the tuna can method. 


True crumpets are not flipped, but the top wasn't cooking through and I didn't want the bottoms to burn, so I flipped them as you would a pancake or an english muffin.  This significantly reduces the nooks and crannies of the traditional crumpet.  


I untraditionally cut the crumpets in half in order to access the nooks and crannies.  I mean, what would a crumpet be with out a goodly portion of melting butter in those nooks and crannies?


After patiently waiting for all the parts to come together, we sat down and enjoyed our almost-proper tea and crumpets.