I will say that I've had to play with the flour since I'm not sure what I'm buying. The recipe calls for high and low grade flour. I just always use whatever I have on hand.
You'll need: flour, milk, yeast, sugar, salt and cornmeal. Simple, no?
Mix the yeast and the sugar.
Then add half of the warmed water. After a few minutes, add the rest of the warm water and all of the warm milk.
In a large mixing bowl, mix the flour and the salt.
Then add the yeast mixture and mix until combined. In this case a hand mixer with the dough hook attachments.
The dough is VERY sticky.
Once it's mixed, cover it with a damp cloth.

Here's what I've discovered after making this recipe about a dozen times -- all with local flour. I like to let it rise for as long as possible in order to maximize the chances of getting real nooks and crannies. I made this batch mid-day and made the muffins the next morning.
Here's the dough after a 20 hour rise.
Pull the dough out onto your work surface. A dough scraper is indispensable here. It helps you manipulate the sticky dough and leaves your fingers fairly dough-free. I lie. My fingers looked like ten Pillsbury dough boys.
Cut the dough into eight equal pieces.
Put the cornmeal into a bowl and cover one side of the dough ball with cornmeal.
Flip and repeat with remaining dough balls.
You'll find that the cornmeal helps you shape the dough ball into a sort of flat disc. It's much more manageable at this point. If anyone makes these with high quality flour, I'd like to know if your dough is this wet and sticky.
Place the eight cornmeal-covered discs onto a baking sheet.
Now place a second cookie sheet over the muffins and let them rise for 20 minutes.
Preheat either a seasoned cast iron or non-stick pan to medium-low heat. Depending on the size of the pan, carefully transfer a few muffins. I find that if I scoot a spatula around each muffin to loosen it, the muffins will best retain their shape.
No pictures of the muffins cooking on the stove top. That's the dark side of my kitchen and the photos stank.
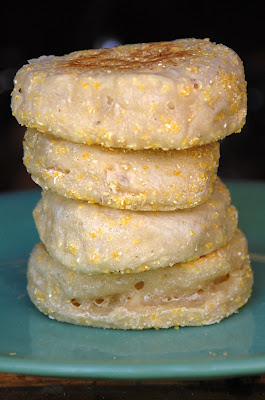
Cook the muffins about 10 minutes on each side until lightly browned and you should have these!
Split open with the tines of a fork, toast, if desired, and slather with your favorite topping. Or make your own egg muffin. Or make mini pizzas for dinner. Very, very, very good.


3 comments:
I make these too! My recipe has both baking soda and yeast, which I always thought the soda made the holes in the dough. Apparently I was wrong.
A- I'd love to try your recipe. Is your dough as shaggy and sticky? I love the end results of these, but a less sticky dough would be nice. I'm also interested in using the baking soda!
Post a Comment